Step 2: Invite Genies to Bid on Your Task
Overview
After you fill in your task details, you must invite at least one Genie before your task can go live. This step happens directly inside the task creation flow — you cannot skip it.
Step 1: Complete Your Task Details First
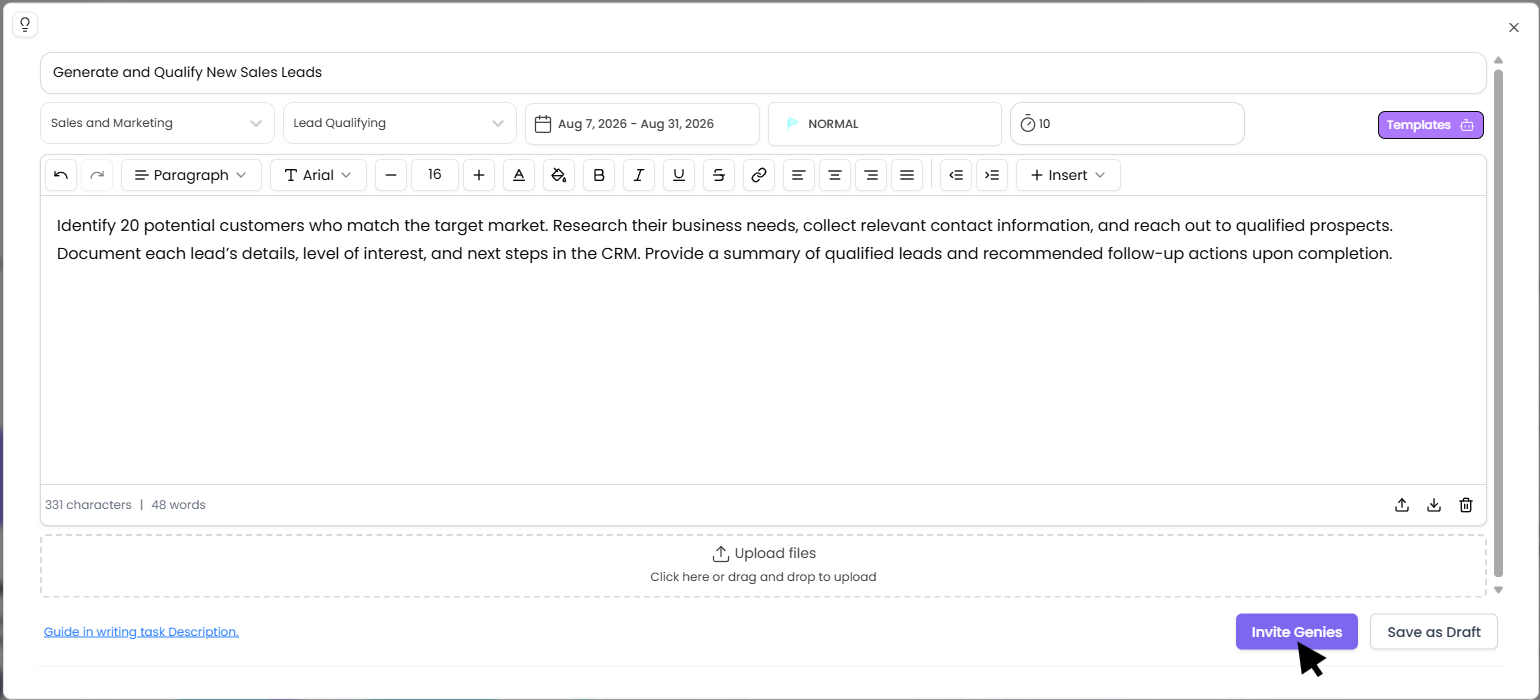
Before the invite screen appears, all required fields in your task form must be filled in. If any required field is blank when you click Invite Genies, the system will show an error and block you from proceeding.
Once all required fields are complete, click Invite Genies to move to the invitation screen.
Step 2: Browse and Select Genies
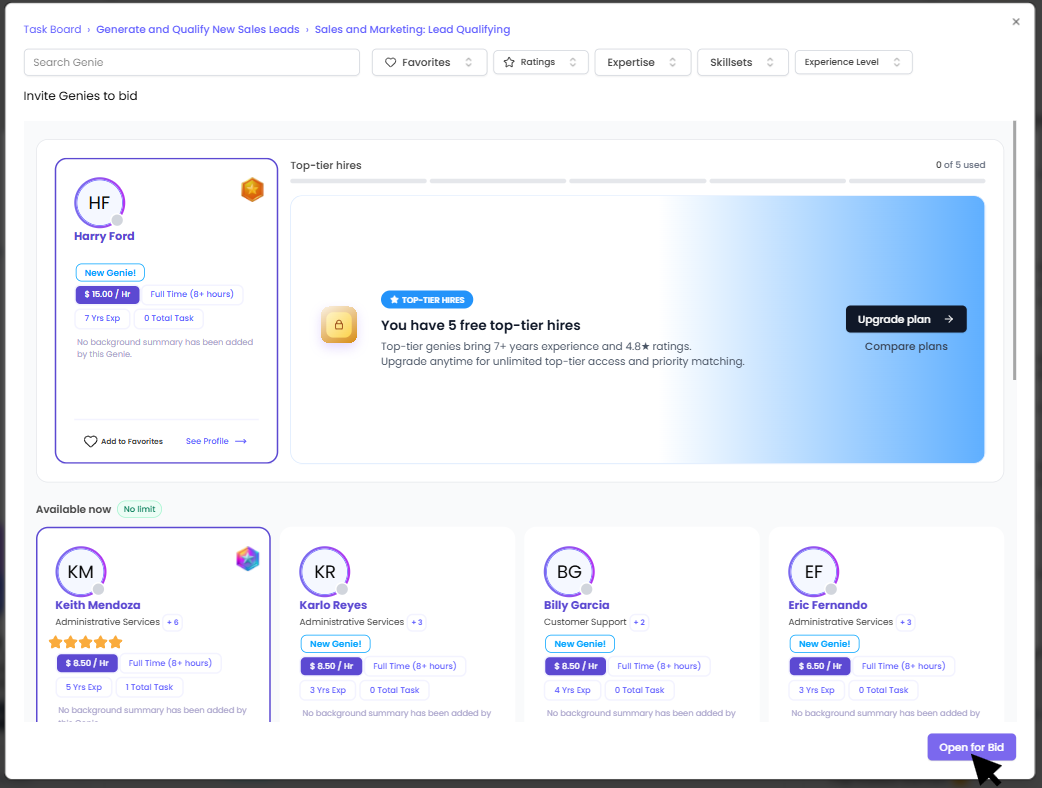
The invitation screen displays a list of Genies with their details: Name, rate, hours, Years of experience. You can also click on See Profile to see the genie's complete details.

Step 3: Review a Genie's Profile (Optional)
Before inviting, you can click View Profile on any Genie row. Their profile opens in a new tab so your current selections are not reset.
You can also click Chat to open a direct message thread with a Genie if you have questions before sending an invite.
Step 4: Use Filters to Find the Right Genie
If you want to narrow down the list before inviting, use the available filters:
-
Search by Name — type a Genie's name directly
-
Favorites — shows only Genies you've marked as favorites
-
Ratings — filter by rating level
-
Expertise — select one or more expertise categories
-
Skillsets — select one or more specific skills
-
Experience — filter by experience level
You can also sort the list by Applicant Name, Skillset, Experience, or Rating (ascending or descending). Sorting by Rating shows highest-rated Genies first; sorting by Experience shows the most experienced first.

Step 5: Invite Genies
Click on a genie to select. You need to select at least 1 genie to proceed.
Step 6: Set the Task to Open for Bid
Once you've selected your Genies, click Open for Bid.
-
If no Genie is selected, the system will show: "Should invite at least 1 genie."
-
If at least 1 Genie is selected, the task status updates to Open for Bid and the pop-up closes.
Invited Genies receive a notification and will see your task in their Invited to Bid section, where they can review task details and submit their bid.
After You've Sent Invites
From your task page, you can also:
-
Resend an invitation to bid to a Genie who hasn't responded yet.
-
Invite a Genie for an interview directly from the matched and invited Genies sidebar.
Once Genies start submitting bids, head to the Applicants tab on your task page to review proposals and choose who to hire.
Full interactive demo
Click through the demo at your own pace — no login required.